Basic Tasks: Oil Change
Changing the oil is the most basic (and common) task in car maintenance. There is much discussion about how much oil, what kind of oil, filter etc. There is a lengthy post about preferences specifically for the Eurovan here on the Samba. Clearly all different types will work fine. As for the rest, basics of engine oil dictate: don't let it get dirty and don't let it get low. So, check frequently that there is enough of it and that it's relatively clean. When it's dirty (or it's been a year or so), change the oil and the filter.
Difficulty:Easy
Time:1 hour
Tools:Sockets: 19mm, 10mm; 6mm Hex, 36mm or large crescent
1.
First you'll need to remove the belly pan.
2.
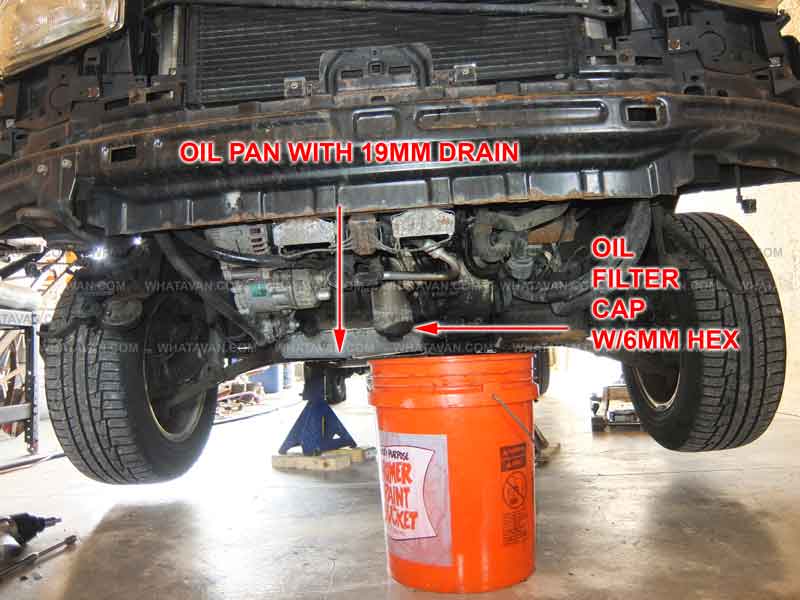
Drain the old oil. Ensure that the van is cool or that you're wearing protective gear. Under the van there are two drains, one from the oil filter housing and another from the oil pan.
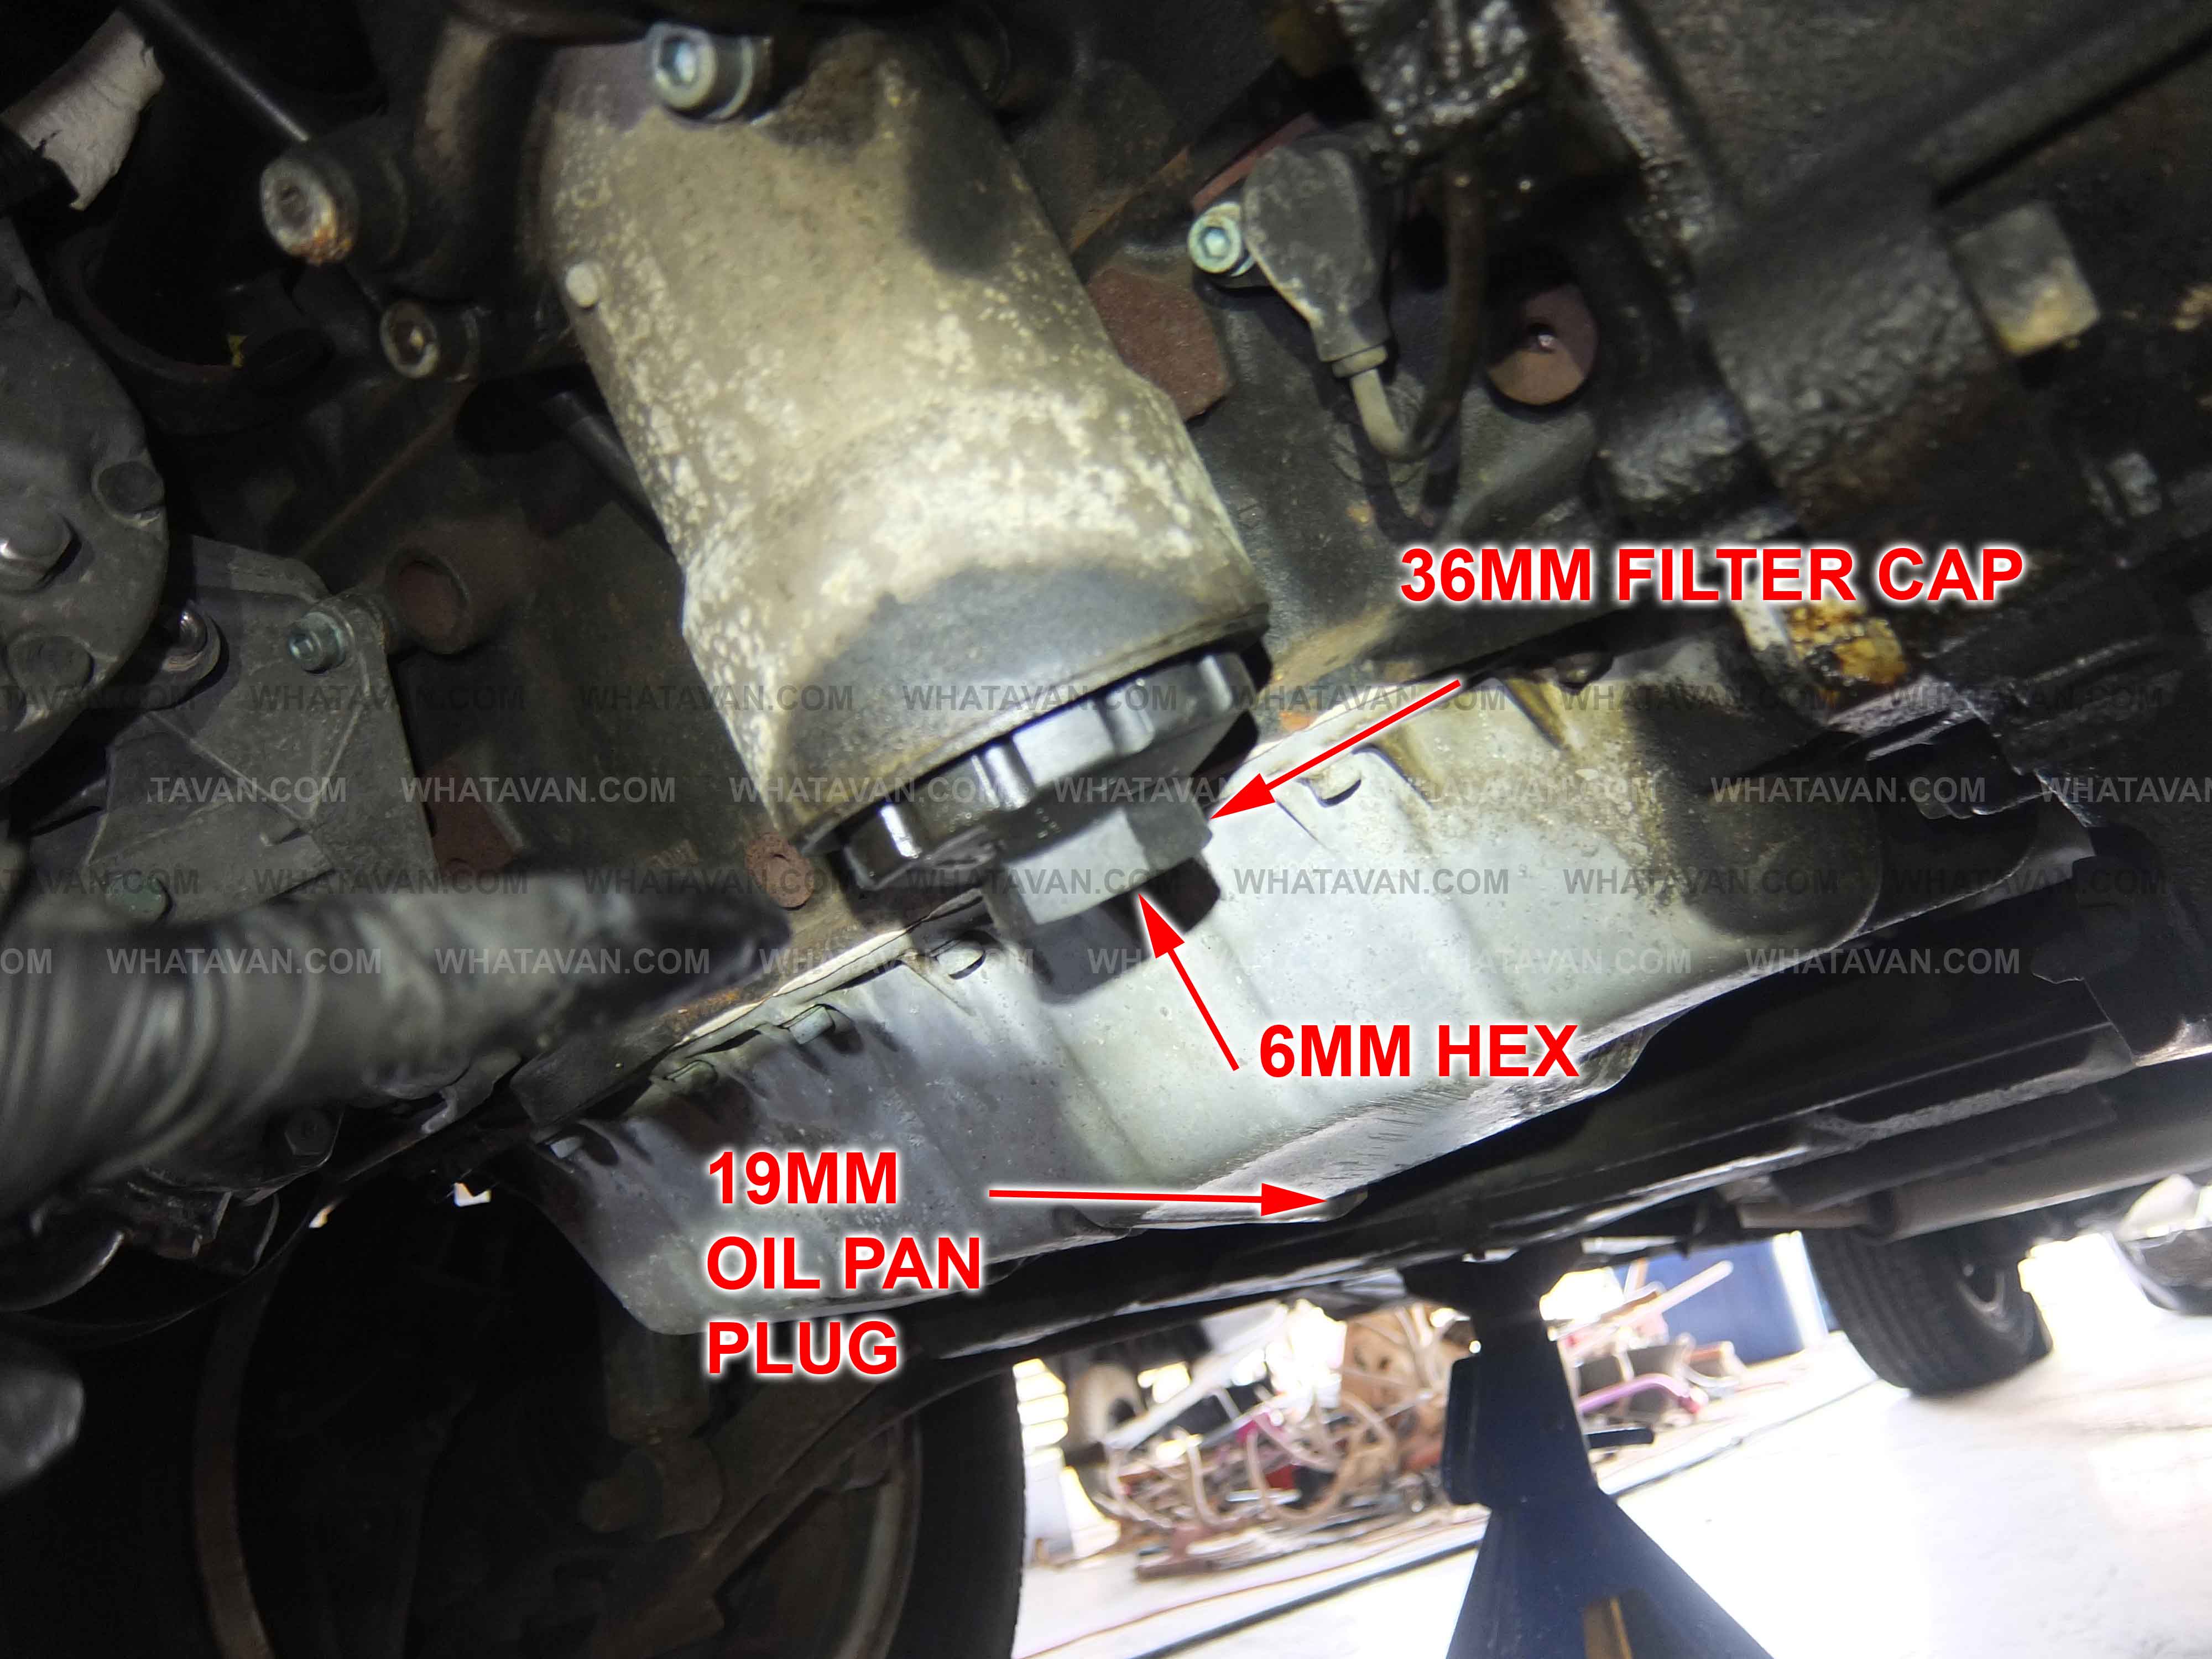
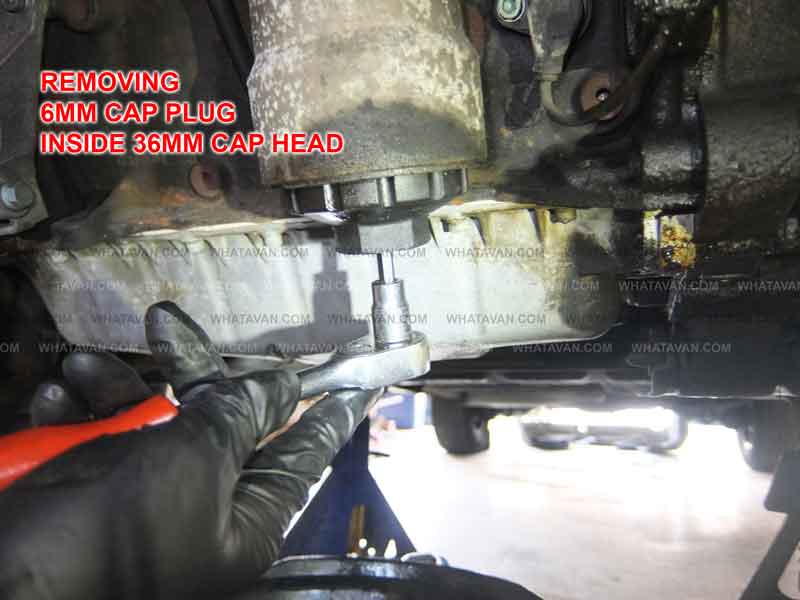
The oil filter housing requires a 6mm hex to remove the drain plug in the cap.
TIP: The drain plug for the filter housing strips easily so be careful. If it's already stripped you don't need to drain the oil filter -- the job will just be messier. The part number for a replacment drain plug is 021115434.
You must also drain the oil from the oil pan. The drain plug bolt for this is 19mm and is facing almost directly towards the rear of the van.
Once the oil has completely drained, replace both plugs and tighten snugly. TIP: It is recommended to replace the main 19mm drain plug and/or copper gasket with every oil change. Because you can easily see the drain plug even with the belly pan installed (that is: you can spot-check it at will) the whole topic is less critical.
3.
Remove oil filter cap. This part is remarkably fragile and will crack if it isn't removed carefully. A 36mm socket helps improve the lifespan of the cap. You can also use a large crescent wrench or even a generic oil filter wrench.
TIP: There is an aftermarket supply of aluminum replacements for this cap which are more or less indestructable. Gruvenparts has one but it isn't cheap and requires you to swap the spring-loaded filter-holder in the plastic factory cap. This isn't particularly easy to do without breaking it. ECS has one as well that's cheaper.
4.
Remove the oil filter by tilting it slightly and pulling. Remove the oil filter cap gasket. Replace both with new and replace the cap with new filter and gasket. Tighten snugly.
TIP: Put a bit of oil on the new gasket to make it easier to replace the cap.
5.
Lower the van to a level surface. This is important for checking the oil level correctly. If you need to drive the van off ramps add 4 quarts of oil before starting the engine.
TIP: It can take a few minutes for the oil to make its way into the pan so don't add too much oil too quickly. Better to add 4 quarts and give it a few minutes before checking your level. Once the new oil is within the range on the dipstick it's safe to start the engine.
6.
Double check level and leaks. First, ensure there is the proper amount of oil. Continue adding oil a little at a time (1/4 quart) until it reaches mid-way on the dipstick. Replace the dipstick and start the van, letting it run until the temperature guage on the dash starts to rise. Turn off the van and check the level again with warm oil. The level should still be within range. If it isn't, either add or drain oil.
Check for leaks and replace the belly pan.


