Basic Tasks: Front Grille Removal & Radiator Tilt
Removing the front grille and hood latch bar of the Eurovan allows the radiator to tilt forward and gives greater access to the engine. Once the radiator is loose you can remove it altogether to have full access to the front of the engine.
Difficulty:Easy
Time:30 min
Tools:Phillips screwdriver, flathead screwdriver, 10mm Socket
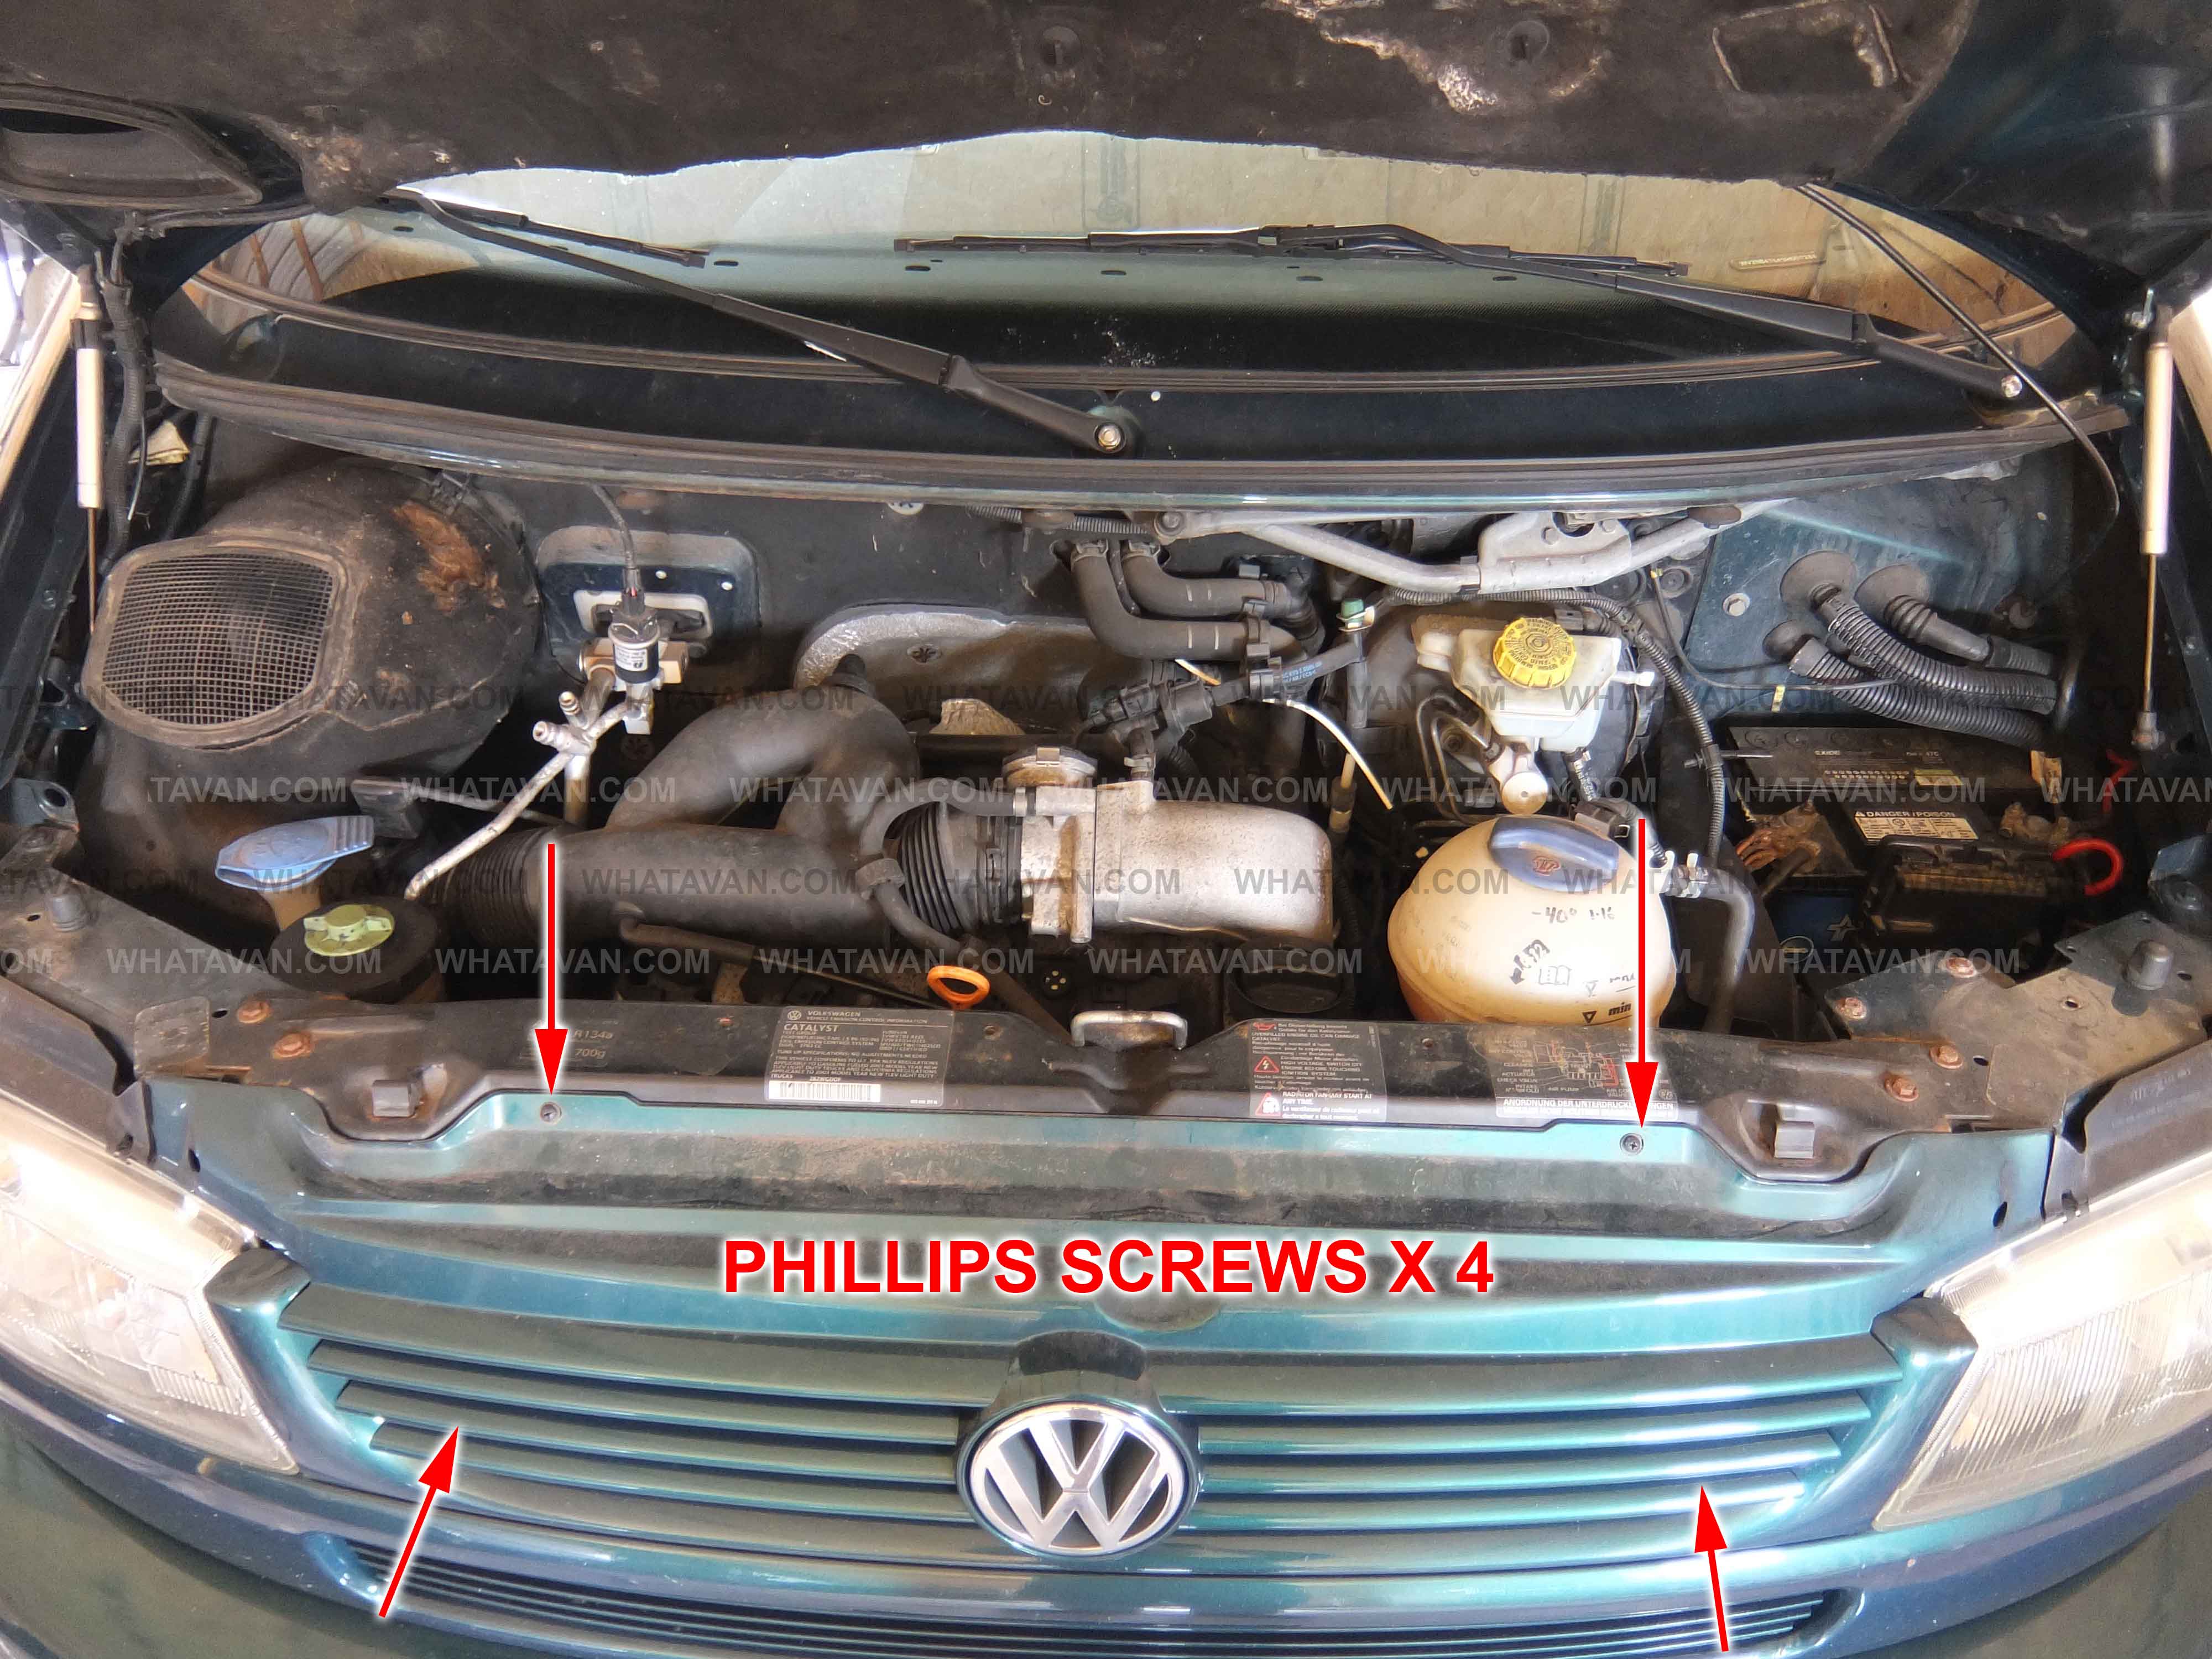 Location of 4 phillips screws for removing top grille. Notice plastic engine cover is already removed.
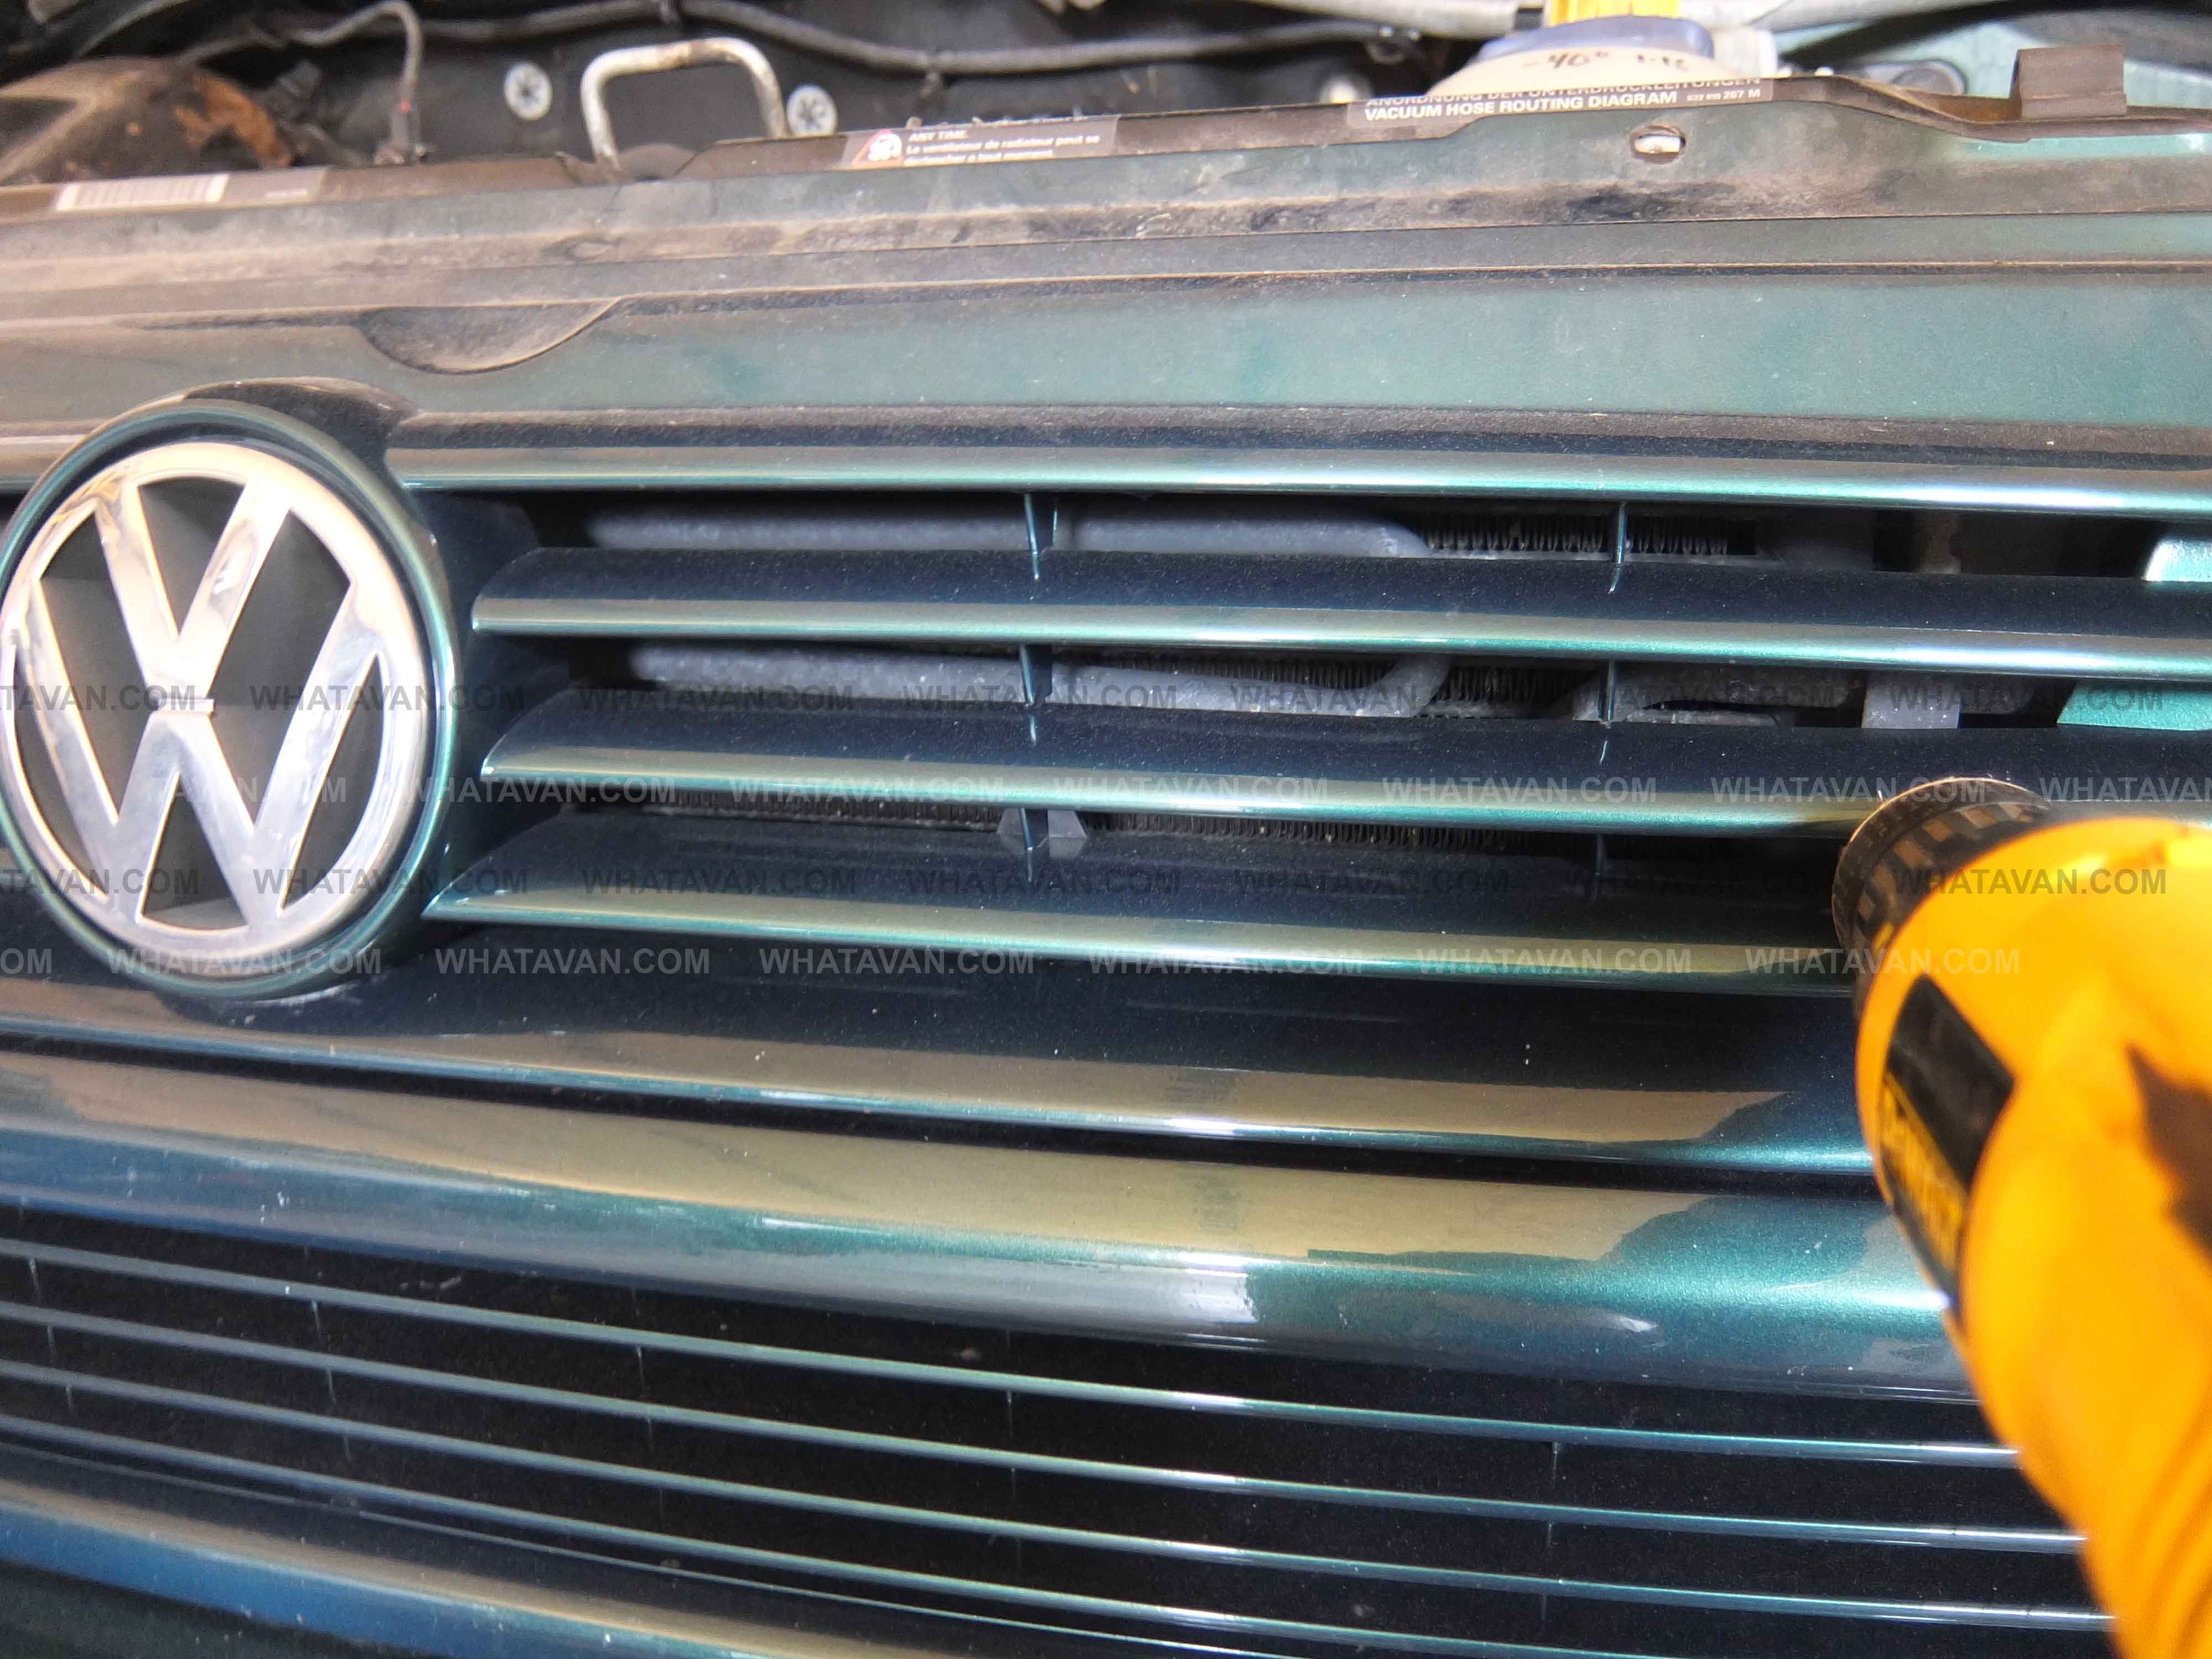 Bottom phillips screws are in between the fins (1 on each side).
1.
Remove top grille. This is the piece with the big VW logo on it.
TIP: Replace screws back into their sockets after removing the grille to avoid losing them.
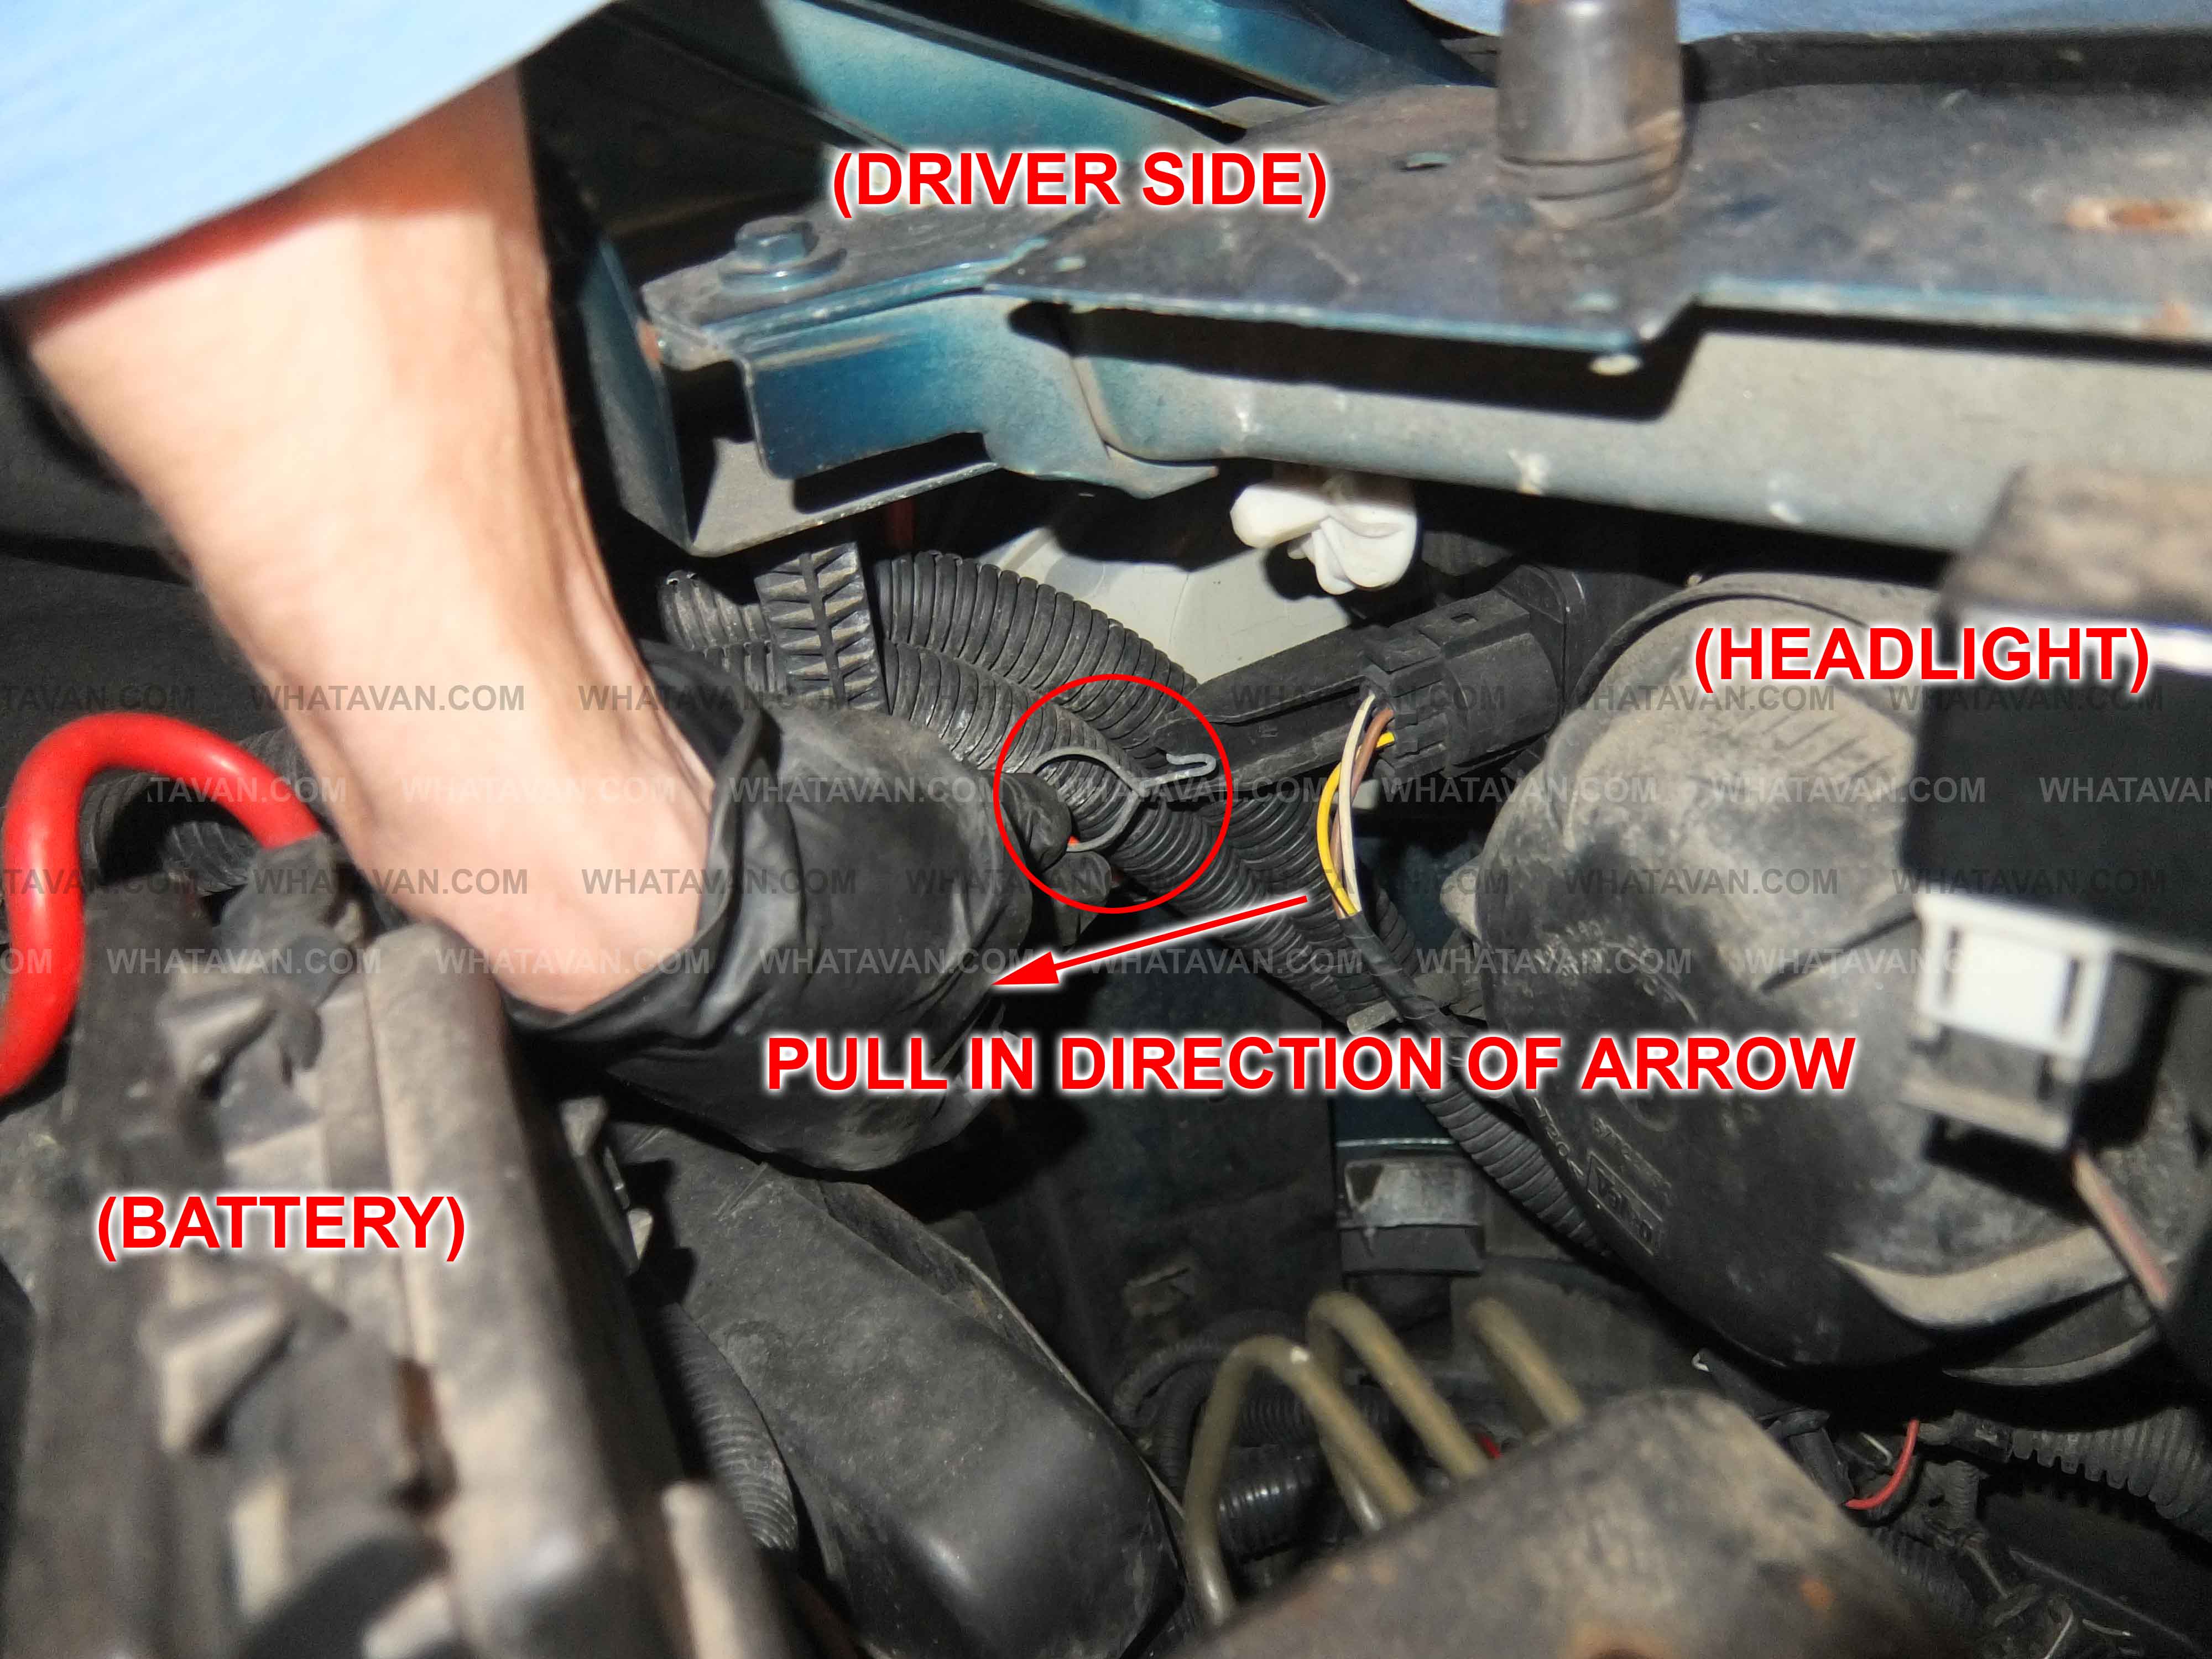 Release side signal lamps. (This assumes removal of large plastic engine cover.)
 Remove side signal lamps from housing.
 Disconnect wire.
2.
Remove the signal lamps. The side signal lamps are held in place by a spring clip that has a loop for you to hold and remove from the retainer. Pull the loop towards the rear of the van and then swing it toward the side and release.
The lamp should be lose and easily slip forwards. Pull it straight forward as there are plastic sliders to ensure proper placement. Don't pull it to the side or you risk breaking the plastic housing.
With the signal lamp out you can remove the electrical harness by lifting the release clip. TIP: These electrical connectors can be frustrating. Don't force them or they will break. The best way is to push firmly in on the socket so that the clip can easily be flexed open; then wiggle it off. TIP: It isn't strictly necessary to completely disconnect the signal lamps but leaving them hanging risks damage.
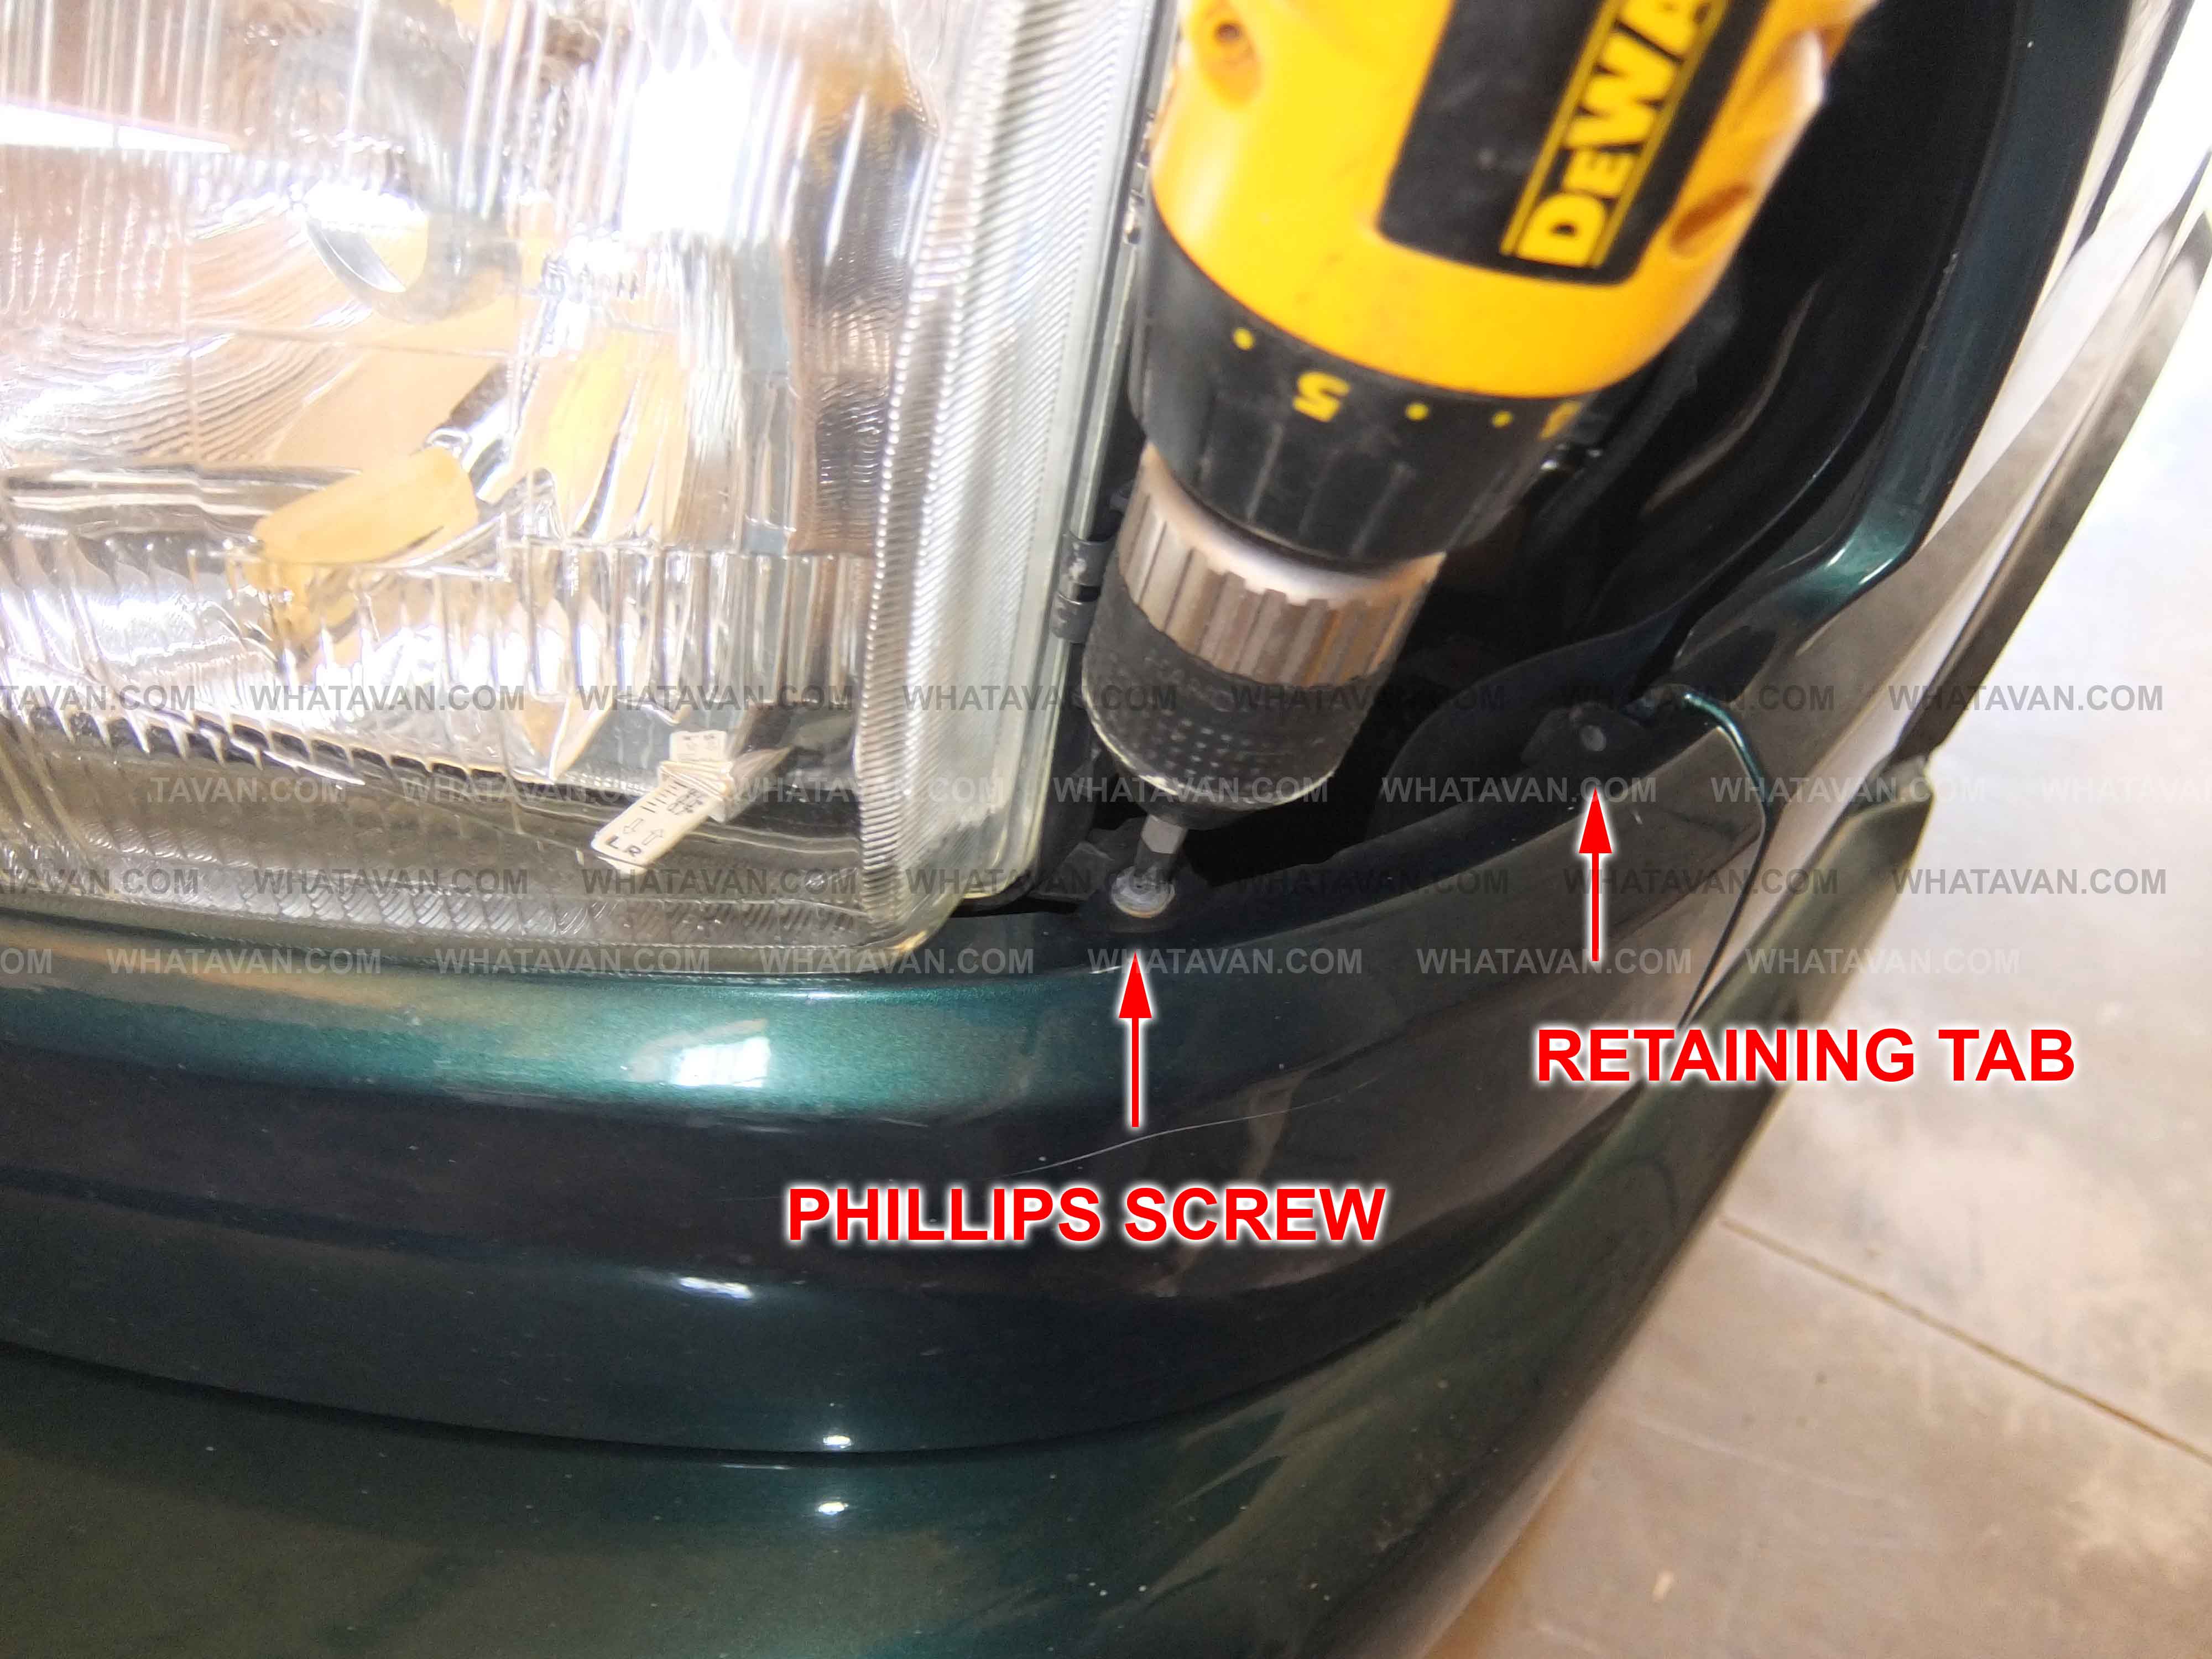 Remove lower grille screws (1 per side).
 Remove two front screws.
 Release retaining tab (1 on each side).
 Both front grilles removed.
3.
Remove the lower grille. This is held on by 4 screws and a retaining clip on each side. (The signal lamps cover the side screws) First remove the side screws then remove the two front screws. Return to each side to release the plastic tab on the retaining clip.
The tab is large and directly behind the grille. With the tab pressed in you should be able to move the grille forwards enough so that the tab is no longer engaged. Put just enough pressure to release the tab as this plastic piece breaks easily. Release the tab on one side then the other side. Once both tabs are disengaged you can pull the entire grille forwards.
TIP: If you break the retaining clip you can buy a new one. It's techincally called "Grille Molding Bracket. Guide." by VW. Part number 7D0854510 for the right/driver and 7D0854509 for the left/passenger. Bus Depot has them.
 4x 10mm Bolts and 2x screws.
 Rubber bumpers.
 Radiator top support bar removed.
4.
Remove the radiator top support bar. This moulded bar runs across the top of the radiator and hold the radiator in place via two big rubber bumpers. It also holds the coolant reservoir (aka "Antifreeze Ball").
Remove the two phillips screws on the front of the coolant ball and the two 10mm bolts on either side of the support bar. Then, with a large flathead screwdriver, push the front and back edges of the rubber bumpers into the support bar. This releases the radiator from the support bar so you can lift the bar out.
TIP: The rubber bumpers are tough, you can just pry the edges past the metal edge.
 Radiator can now be tilted forward.