Tricks: Permanent Door Handle Fix
Front door handles on the Eurovan have a design problem that causes them to fail. The force from pulling on the handle is transferred to internal mechanism by a single weak aluminium post. Over time the stress breaks this post off. A new replacement handle is expensive and requires that you transfer your key tumbler. Then you have another handle with the same structural weakness. If you have a drill this $10 trick is only slightly more involved and is a permanent fix because it replaces the weak post with a stud or bolt that is screwed securly into the thick block of aluminum that forms the front of the handle.
Difficulty:Intermediate
Time:30 min
Tools:Philip Screwdriver; Powered Drill (drill press is ideal); 5/16 bit;
Parts:M8 1.25mm tap & bit, 50mm long M8 1.25 stud with locking nut (or bolt & threadlock)
1.
First, let's review the required materials. I chose to do this with a M8 1.25mm exhaust stud with a locking nut because it's the right length (50mm) and the right diameter (M8) and I happen to have a bunch lying around. That said, any 50mm M8 stud or bolt will work. You simply need to ensure it won't come loose and that it doesn't stick out more than about 18mm (more on that later).
 Factory handle noting distances to match.
2.
Remove the broken door handle. Unscrew the two large philip screws on the inside of the door edge nearest the handle and pull the handle out. TIP: Make sure you have the metal arm that has probably broken off. Don't let it fall into the door.
 Two screws to remove handle.
 Metal arm.
3.
Drill out the thin base where the post used to be attached using either a 5/16 or the M8 bit for your tap. The point here is to allow the stud or bolt to pass through this old base and use it as a support collar. The bolt or stud will actually be firmly attached to the much stronger and thicker front of the door handle.
Continue drilling into the thicker metal of the door handle front with the bit for your tap being careful to not drill completely through the handle.
TIP: This is where a drill press comes in handy. Set the press to stop around 3mm from the surface. If you don't have a drill press put tape around 34mm/1.33in from the tip of your bit and stop when the tape reaches the back of the handle.
 Broken stud & base to be drilled through.
 Setting drill 3mm from front of handle.
Drilling through base and into thick handle front.
Setting drill 3mm from front of handle.
Drilling through base and into thick handle front.
4.
Use the M8 1.25 tap to cut threads into the drilled hole.
TIP: Goes slow and reverse the tap 1/4 turn every full turn.
 Threading hole with tap.
5.
Widen the hole in the metal arm using the 5/16 drill bit so that it fits over the stud or bolt easily but not too loose. The metal arm will need to move easily for correct operation.
TIP: Clamp the arm down so it doesn't get caught on the bit.
Widen the hole in the metal arm.
6.
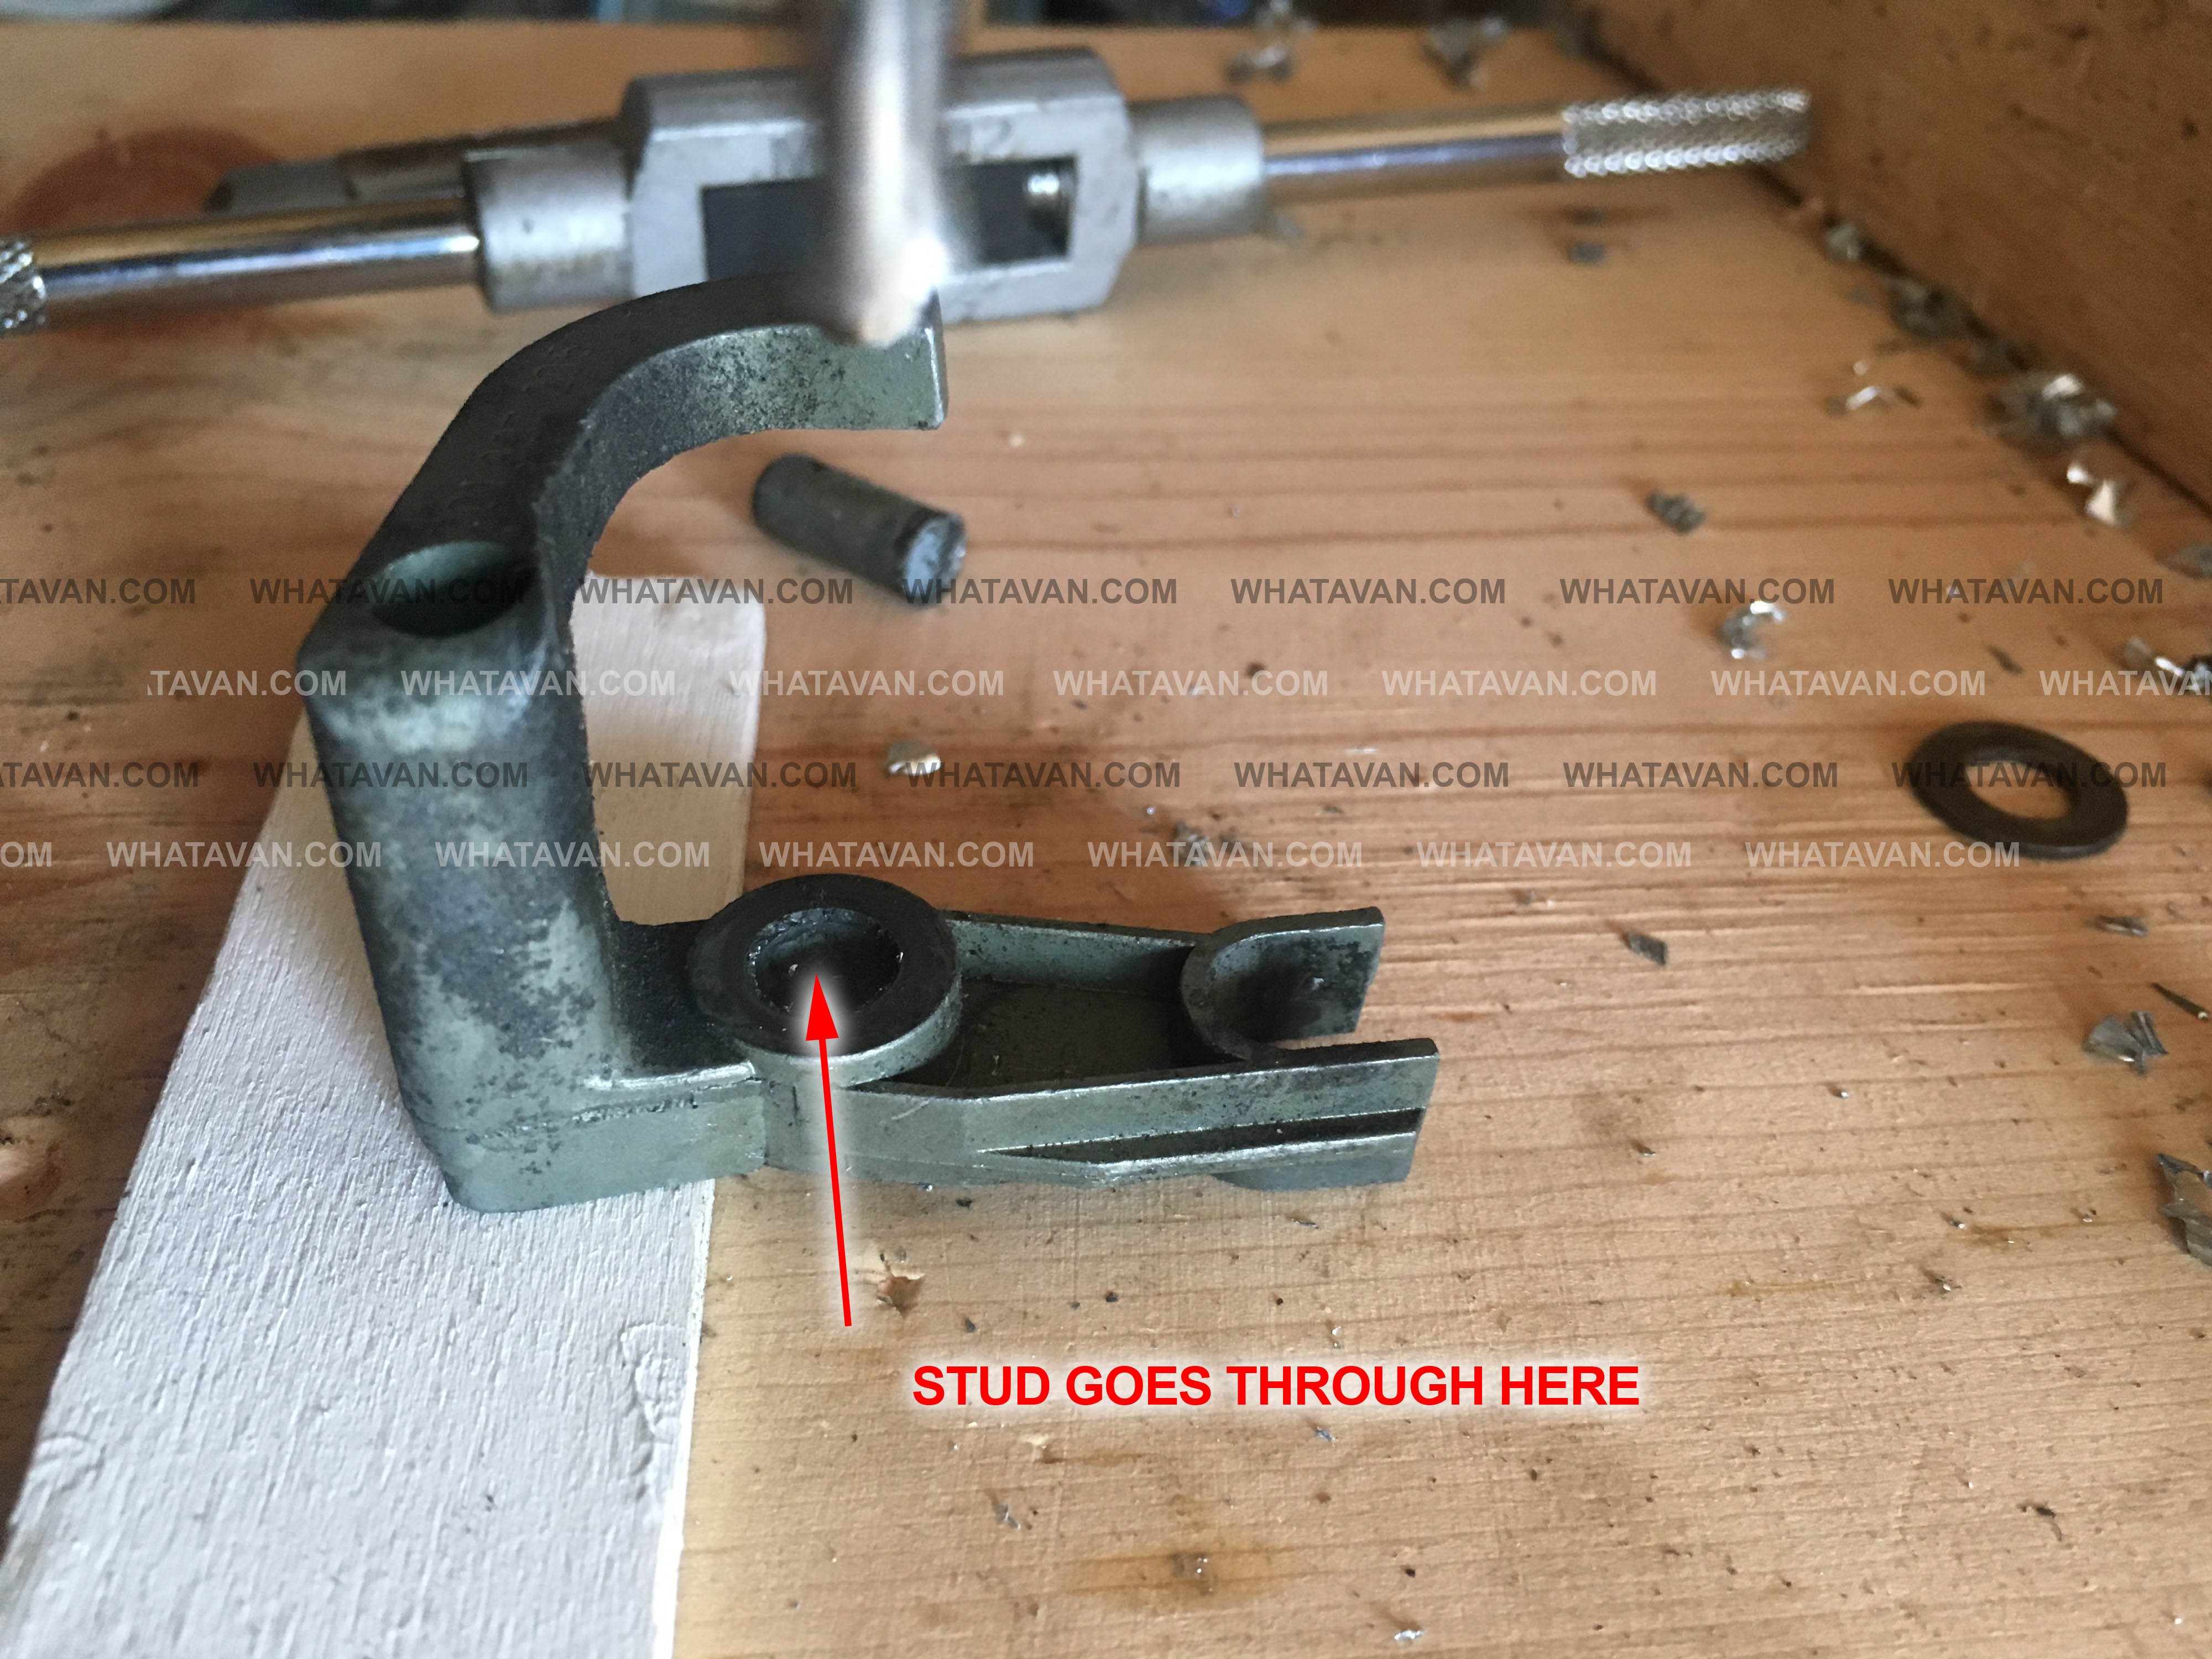
Reattache the arm to the handle by screwing the stud to the handle, placing the arm over the stud and locking it on with the nut.There should be no more than 18mm from the bottom of the collar to the end of the stud. If there is more than this you either didn't drill deep enough or set the stud/bolt deep enough. If you're using a bolt place the bolt through the metal arm and tighten into the handle with a bit of threadlock. Don't over tighten the bolt or nut. The arm should be loose enough to move easily but not so loose you feel it when pulling the handle.
 Stud set into newly tapped holes.
7.
Replace the handle into the door. The door should be unlocked. Insert the top first and then the bottom. If it doesn't easily slide back into the door shake it a bit or tap it gently into place. Then replace the two philip screws, testing the mechanism before tightening them completely.
TIP: If you can't lock or unlock the door you've probably not set the stud in far enough. Ensure that there is no more than 18mm from the bottom of the collar to the end of the bolt or stud.